In the fast-paced world of professional cooking, precision is paramount. Eyeballing measurements might work for some home cooks, but a chef understands that consistency and quality hinge on accurate ingredient quantities.
This visual guide will help demystify the subtle yet critical differences between measuring liquids and dry goods, ensuring your dishes are perfectly balanced every time.
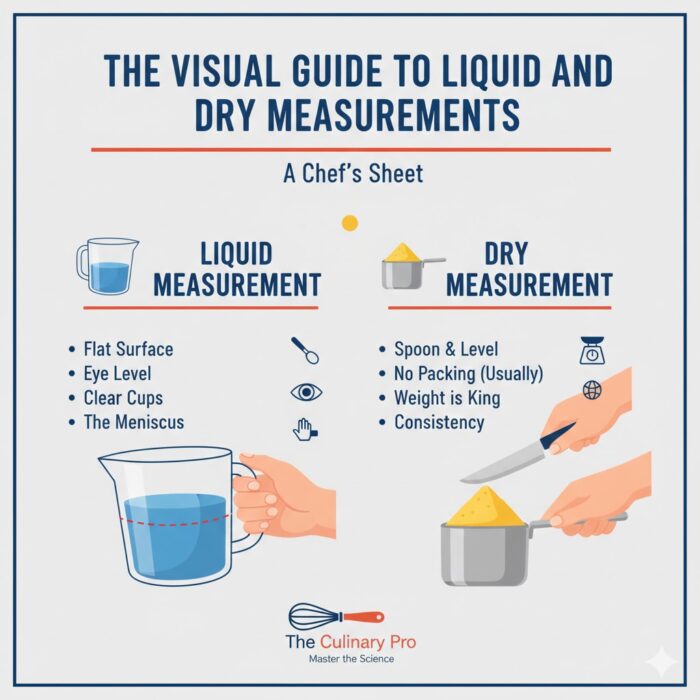
Understanding the Differences: Liquid vs. Dry
The fundamental difference lies in how each substance behaves. Liquids conform to their container, creating a level surface tension (meniscus) that is easily read at eye level.
Dry ingredients, especially powders like flour or granulated items like sugar, can be compressed, aerated, or stacked, leading to significant inaccuracies if not handled correctly.
Liquid Measurement Best Practices:
-
Flat Surface: Always place your measuring cup on a flat, level surface.
-
Eye Level: Bend down to eye level with the measurement line to avoid parallax errors.
-
Clear Cups: Use clear glass or plastic measuring cups with visible markings.
-
The Meniscus: Read the bottom of the meniscus (the slight curve in the liquid’s surface).
Dry Measurement Best Practices:
-
Spoon & Level: For flours and powders, spoon the ingredient into the measuring cup until overflowing, then level it off with a straight edge (like the back of a knife).
-
No Packing (Usually): Unless specified (e.g., brown sugar), do not pack dry ingredients. This can drastically increase the amount.
-
Weight is King: For ultimate accuracy, especially in baking, always use a digital scale.
Conclusion
Mastering the art of precise measurement is a cornerstone of culinary excellence. By understanding the unique characteristics of liquid and dry ingredients, and applying these best practices, you’ll ensure consistent, delicious results worthy of any professional kitchen.